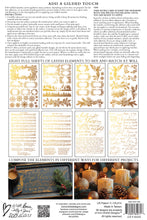
Introducing Tinsel, a gilded Christmas transfer designed to capture the enchantment of the holiday season with its intricate details and beautiful typography. Start your handmade holiday crafting with a gilded transfer that allows you to add a little glitz to gift tags, wall art, and small decor in minutes. Think about how many gifts you could make with this set alone (hint: more than we can count 😉)!
Project Suggestions:
-
Mason jars with luminous trees and sprigs sprouting from the bottom of each jar.
-
Card making or gift tags with elegant touches of gold (those labels?? Hello!).
-
Make plain kraft paper into something truly unique for your holiday gift wrap!
-
Layer gold foil trees on the background of your DIY holiday signage.
Pair With:
-
Yuletide Transfer
-
Crimson Velvet Transfer
Application
Start with a clean, dry, matte surface. If painted, make sure it’s well cured, and if you have sanded the paint make certain there is no residual dust. All of these things will interfere with adhesion.
Carefully remove the transfer from its white backing. Slowly and carefully lower the transfer onto your intended surface, making sure that it does not touch until the placement is correct.
Use small pieces of low tack tape to hold it in place.
Using the provided tool, or one of your choice, start at one end of the transfer and rub firmly to adhere the image to the surface. Do this until the entire image is transferred. You are welcome for the free arm workout as well. If any parts aren’t transferred when you lift, simply lay it back down and rub more on that portion.
After it is transferred, with a clean dry hand, smooth down any bits that aren’t flatly adhered.
We recommend sealing with a water based (or not harsh solvent based) sealer (waxes created for furniture paints also work well if they don’t contain harsh solvents).


